This mod shows you how to insert a power programmable timer relay into the lighting system, which will automatically switch from day lights to night lights at a set time (by you) every day. It uses the existing power supply and LEDs, and only requires you to buy a power programmable timer relay and a bit of wire (~$10), which you will insert between the existing power supply and the light switch. The timer relay will draw power from the existing power supply, and will then automatically send it either to the white day lights or the blue night lights, depending on the time of day.
The mod also describes how you can add additional lights but this is optional (however, in that case, I suggest to replace the power supply – 2A).
Recently I bought a Fluval Edge 2 aquarium 46L (12 gallons). The tank is beautiful and stylish, but soon I realized that the lighting system is a bit of a let down for me although it is a big improvement from the previous version.
“It comes complete with the new powerful & efficient 42 LED lighting system with deep blue night light setting. 7600k high luminosity LED’s suitable for aquatic plants.
Complete with a 3 position on and off light switch with bright white daytime or deep blue night light or off position. ” – you can read a few reviews.
There were two letdowns for me. The switch is manual and I got annoyed to switch on and off the light each night and each morning. The fish shop told the the plants I want to use demand more light and in this aquarium they will just die.
So I decided that if possible automate the lighting system with a timer and at the same time upgrade it by added a few extra LED‘s. However I did wanted to keep the warranty so all the modifications I did, did not alter any original component of the tank. Which means in case anything in the original setup breaks you can still revert back everything to the original condition and claim your warranty.
DISCLAIMER: This modification is experimental, so if you decide to do it yourself then you are on your own, I can’t be held responsible for any problems/issues/damage/injury that may occur if you decide to follow this build.
All the modifications I wanted to do with a low budget and I am sure if you want to spend more you can build even something much more sophisticated.
So here is my solution!
Parts:
2 Aluminium LED Heatsink 142x24mm (rail spacing 18mm) – AU $10.98
1 36mm Cooling Fan – AU $1.88
1 Digital LCD Power Programmable Timer – AU $10.38
1 5.5×2.1 DC Power Female Jack – AU $1
2 White 30cm 18:LED’s 5050 SMD Flexible Waterproof 12V – AU$ 9.81
1 AC 110-240V/DC 12V 2.5A Power Supply – AU $29.95
1 5M speaker cable – AU $4.99
1 35cm Wire Strippers – AU $2
Total budget: AU$ 70.99
Everything was bought from eBay (except power supply) and prices include shipping to Australia.
The most expensive was the AC power supply but since the ones on eBay were worthless I bought one from the local store. If you have by chance a laptop or any other power supply with at least 2A that will do.
I am sure you can find wire strippers or even wires around your house, and the total cost can be cut down significantly (~ AU $30-40).
The plan
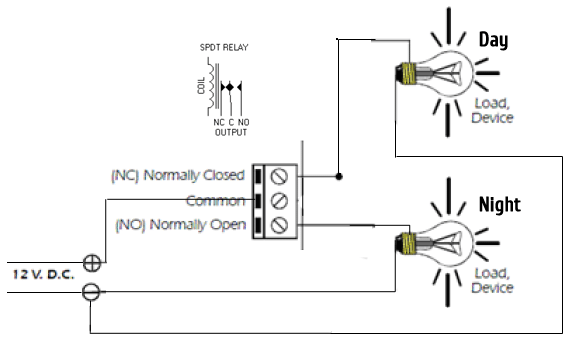
As you can see from the image, the relay will switch between day and night light. There is no off position just if you unplug the system from the power supply (or you switch off the switch, but you’ll see this later).
The Day light is connected to the Normally Closed position of the relay since in this case, the relay won’t consume any power to activate the relays magnet.
Under the hood – disassemble Fluval Edge 2 lighting unit
First be sure everything is unplugged from the main power supply 🙂
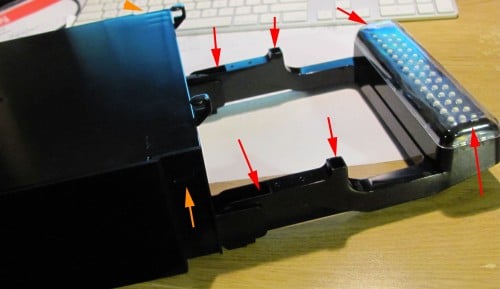
To disassemble the lighting unit you need to unscrew 6 screws as seen on the image. The LED are covered with a transparent plastic, but this can be easily removed using your nails or anything that won’t damage the plastic.
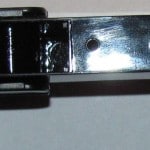
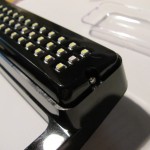
(click on the image for the full-size image)
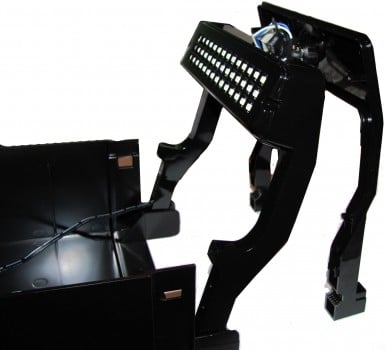
The unit will come into two peaces as seen in the image below and you will see just some wires connected to the switch and to the panel with the LED’s.
The switch is a 3 position switch with blue (night mode), white (day mode) and the off position.
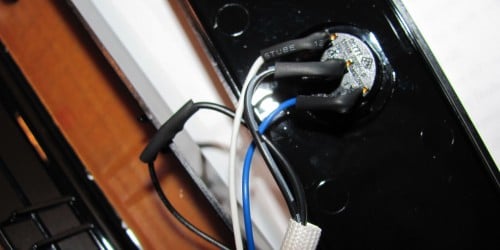
As you can see there are 2 wires coming from the power supply, one is connected directly to the LED board, while the other wire is connected to the switch. Then the switch has 2 outputs, a white and a blue. As you move the switch from on position to the other it will make the connection between the wire from the power supply to the white wire or alternatively to the blue wire (the off position obviously won’t connect to anything). Simple as that.
Having seen this setup my plan was to leave the switch connected to the white wire all the time and add an extra wire to the blue wire. Then I wanted to connect the 2 wires to a timer that will switch automatically the light for me. You’ll see later how this was done.
Wiring the Switch – Fluval Edge 2 lighting unit upgrade
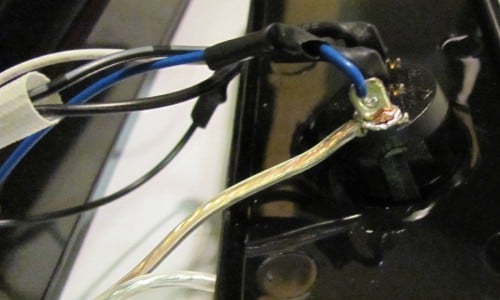
As I mentioned earlier I will be adding a new wire to the blue (night mode) and this will be connected to the timer. Since I wanted to avoid loosing the warranty this new wire was connected to the switch tightly but without actually soldering to the switch. If you don’t care about the warranty just solder to the switch. Otherwise the plastic isolation can be pushed gently upwards and you will have enough room to connect the wire. Isolate the wire with some new tape, and leave the original isolation untouched since in case you want to revert back to the original setup you’ll reuse it. That’s all, we are done here! Let’s see what we did 🙂
Since the wiring of the unit was done you can put the unit back together. We ended up with a new wire connected to the blue wire, the white wire is connected using the switch on position for day light and we have the third wire connected directly to the LED board.
Let’s test this. Connect 12V to the new wire and one of the wires from the original connection. The blue light will turn on.
Connect 12V to the original wires and the white light will turn on.
Adding more LED’s – Fluval Edge 2 lighting unit upgrade
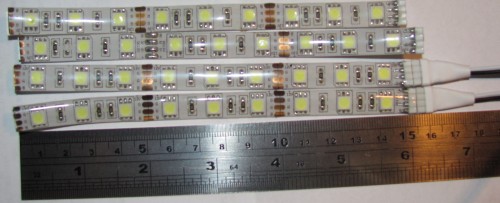
As I mentioned earlier although the unit already has 42 LED’s based on “experts” advice (I am not one) I wanted to upgrade/extend the LED’s as well by adding a few extra (36 x SMD 5050 White LED) light source.
The LED’s come in a 30cm long strip which you can cut in half considering the space under the hood.
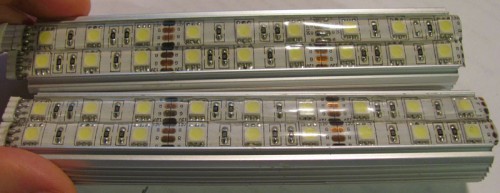
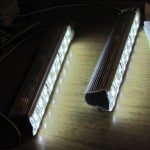
You can place exactly 2 LED strips to the heatsink. The strips will fit tightly next to each other but the waterproof protective layer is flexible, and they will fit. The strips come with peel and stick backing which enables secure placement of the LED strip Lighting on the heatsink.
In order the addd LED’s to fit properly under the hood I had to slightly bend the heatsinks as you can see on the image. Using a hammer this can be done quickly and easily. I already had the LED’s on the heat sink when I realised I need to bend them a little, but you can do this before and don’t worry you might damage the LED strip.
Wiring the LED strips – Fluval Edge 2 lighting unit upgrade
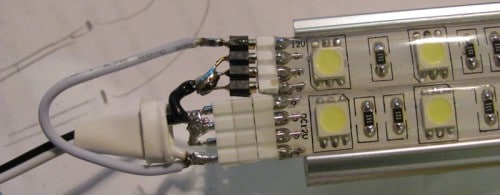
This is a white LED strip with 4 connectors labeled 12V, R,G,B . We need to connect one wire from power supply to the 12V input and he other wire to R,G,B input at the same time. The image should be self explanatory. Once you done this give it a try. Connect the LED’s to a 12V power supply and both of the SMD 5050 LED strips should emit a bright light. Should everything work fine isolate the wires with silicone that is suitable for aquariums (small tubes are available at the dollar shop at AU $2.99) .
It worth mentioning that the wires are connected to the LED’s using a 4 pin connector. If you like you can solder the wires directly to the led strip, but in case later you might want to change the LED’s it won’t be so easy. With the 4 pin connector you even have the flexibility to turn off a strip if the light is too bright.
The heat sinks then get attached to the original LED unit with wire strippers. To avoid scratching the plastic with the heat sinks, I applied black sticky tape on the sides.
Installing the Timer – Fluval Edge 2 lighting unit upgrade
In my setup, the light was upgraded to some extra LED’s. If you want to add just the timer, you can skip the LED upgrade and just install the timer. The setup is the same in both cases.
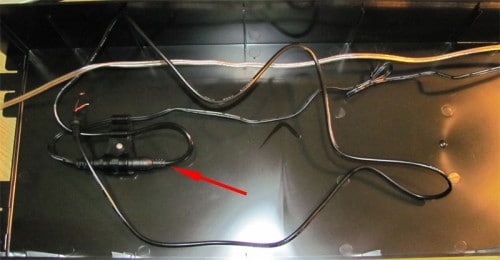
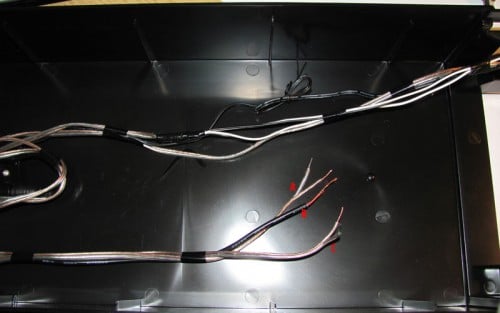
Before I installed the timer I wanted to tidy up a little bit the cables and I used sticky tape to tie them together. I ended up with a few wires 🙂 One for each extra LED extension, one wire for the blue light and one wire for the original lights.
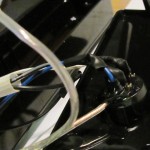
In the image above you can see the original cable coming from the LED’s. The power supply was disconnected and a cable from a broken power supply was used to extend the cable. As I mentioned you don’t need to cut, modify any original component of the aquarium 🙂
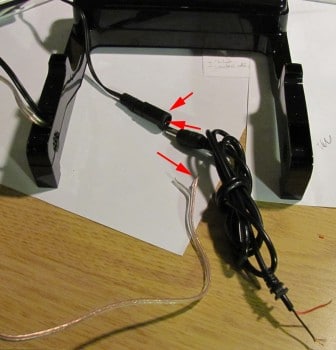
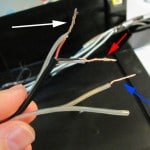
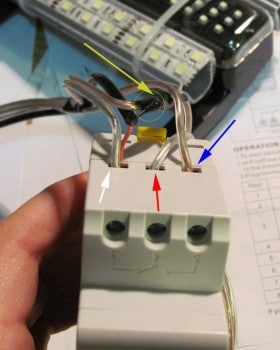
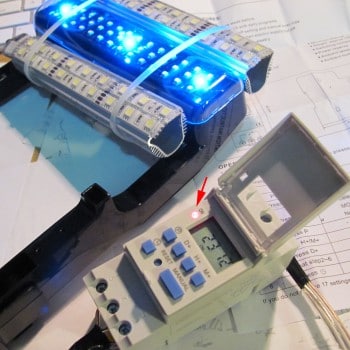
At this step I have all the cables tied together and they are ready to be connected to the timer. You might wanted what all these cables are, so A is the LED extension (one cable connected to the 2 new lighting units), B is the original LED unit and C is connected to the blue light. On the second image we remained with three loose ends, the wire marked with red will be connected directly to the power supply while the white and blue to the timer which will switch between them.
The wire with red mark is coming from the power source, the one marked with yellow is also connected directly to the power source. The timer will connect the red wire to the white and blue alternatively based on your settings.
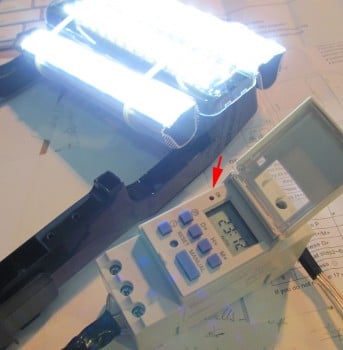
The power supply is used to power both the timer (with the relay) and all the lights as well. Since the power supply has 2.5A this is powerful enough to drive both units. I did some measurements and actually the new setup is not using that much power. With all the lights on the power consumption was 0.75 A. In the night mode the timers’ relay was powered and the blue light and together they are using 0.05 A.
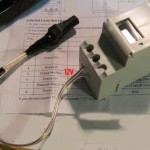
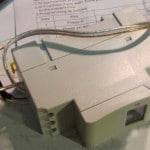
Normally closed position of the timer on the left and relay engaged on the right. You can program the timer differently for each day, and each day can one day mode and one night mode.
The End Result – Fluval Edge 2 lighting unit upgrade
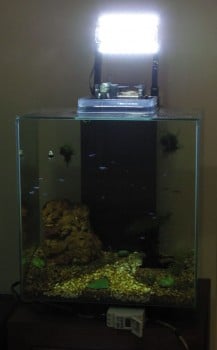
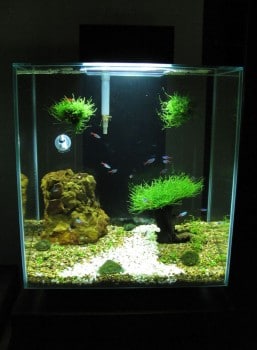
The newly added LED’s will produce much more light, while the timer will switch the lights automatically and you won’t be annoyed to manually switch them.
I hope the information on this page was helpful and you already started cracking to add a timer to your aquarium 🙂 If you need help drop my a line and I will try to help with what I can.
If you have a higher budget and you want smooth light transition, or you want light for a reef setup have a look at this website: https://www.nano-reef.com/forums/index.php?showtopic=288026
PS: Suggestions, ideas, text corrections are welcome 🙂



11 comments: On Fluval Edge 2 DIY Lighting System Upgrade with LED light and Timer
Thanks for a great guide… I think I will mod my light on the same Fluval Edge 12 Gallon system… Especially for the auto switch between blue and white light… I’ve been looking for a guide on how to do this for a while.
On another note… Is the floating suspended plant in your tank real and if so whats the name of it?
Thanks,
Jonathan
Hi Jonathan,
The plant is real. It’s java moss, the same plant used for the tree you can see in the aquarium.
Cheers,
Peter
Thank you so much for this mod. I was thinking of adding a separate power supply with its own timer (just for switching day and night lights), which would have been more money, more wires, more work, and more importantly, much more risky, in case my timers happen to overlap. Not a very good mod in other words. But THIS mod is great. It does exactly what I want with less money, less wires, less work, less power cords, and safely to boot. (I simply don’t understand why Hagen didn’t include this functionality as another option on the switch, even if it was preprogramed — I would have settled for a preprogramed day/night cycle, and gladly paid another $20-$30 for it.)
Thanks again for helping those of us who would not have figured it out!
PS: Although I think I understand the mod, it took me a little while to figure it out. It might help if there was a general, introductory statement explaining what this mod does and how. Something like:
“This mod shows you how to insert a power programable timer relay into the lighting system, which will automatically switch from day lights to night lights at a set time (by you) every day. It uses the existing power supply and LEDs, and only requires you to buy a power programable timer relay and a bit of wire (~$10), which you will insert between the existing power supply and the light switch. The timer relay will draw power from the existing power supply, and will then automatically send it either to the white day lights or the blue night lights, depending on the time of day.”
Great mod, one question what happens if you want to overlap the timers? for example you want to have the white and blue light at the same time.
Thanks
The way the light is build, when the day light is turned on, automatically both white and blue will be on at the same time.
Actually, I just realized I misunderstood the mod, I thought the additional power supply was for the additional lighting, but I now see that it DOES require an additional power supply for the timer relay itself. Is there any way to use the existing power to power the timer relay?
Hi John,
Thank you for you comment. I added your text to the post, I hope you don’t mind 🙂
Just to clarify. You DO need just ONE power supply and you can use the existing one.
The power supply will power the LED’s and also the switch.
Cheers,
Peter
Very nice lighting upgrade.. TOP!!
Check out my DIY-Projects for the Fluval Edge 😉
Look at http://www.aquaristik.bplaced.com!
Great post!But i think this upgrade is quite complicated!
Great idea so i’ve attempted it using the same timer as you and i’ve been successfull with the 12v tests for day and night that you suggested but when it comes to wiring the timer in I get no results! I’m not adding led’s just a timer to switch day to night I seem to have lost the plot at the wiring the timer stage! Would it be possible to repost some clearer step by step instructions on which wires exactly go where in the timer( which is pos and neg) and some clearer pics would be a great help too thanks for the info so far just need a bit more to finish the job!
Would it be possible to post some instructions or make a video that explains only how to put a timer on the standard switch without adding any additional lighting? I’m getting a bit lost in your instructions, but this simple mod is something i’m very interested in doing.
Thanks so much.
Sliding Sidebar
About Me
I am passionate about Cyber Security, Pentesting and just making things work.
Recent Posts
Archives